Ok, for the first step, you need to prepare your cording. You can buy premade cording, which means you can eliminate this step if you want. But, if you want to have the cording match or to be a specific material, it's really quite easy. You will need it to be the same length as the perimetre of the pillow. In my case this is 20 inches x 4 sides, or about 80 inches. I make it a bit longer, since you need to overlap the start and finish a bit. I am doing curved corners, so you don't really need to add any extra for the corners. In total, I am doing about 85 inches of cording.
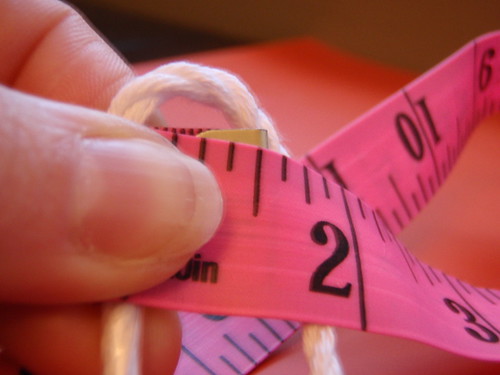
You can really choose any size cording. For this one, I think I chose 6mm, but it's really up to you what size you use. Then, you are going to need to measure how wide you need your strips of fabric to be. I do this with a tape measure. I wrap it around the cording, leaving 1/2 an inch on each side of the cord.
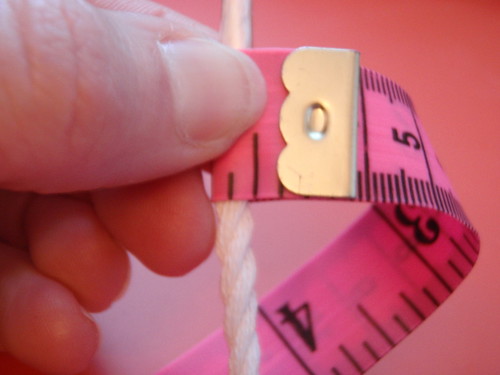
Then, I look to see how wide the fabric needs to be. In my case, this is 1 and 1/2 inches.
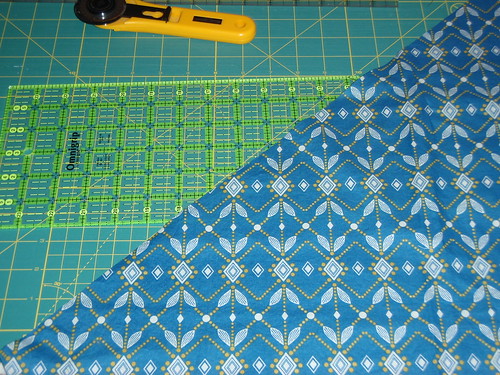
Next, I cut strips of fabric on the bias 1 and 1/2 inches wide. You know how to do this right??
Ok, then I sew my fabric together, to make one continuous strip. For those of you who have made a binding for a quilt - you use the same method. For those of you have no idea, here is a quick how to.
You place the two pieces of fabric right sides together in a "t" type shape.
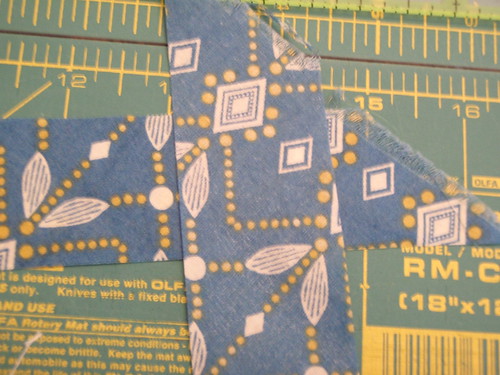
Then you sew from corner to corner.
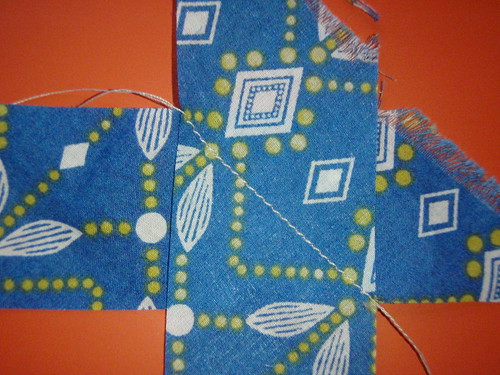
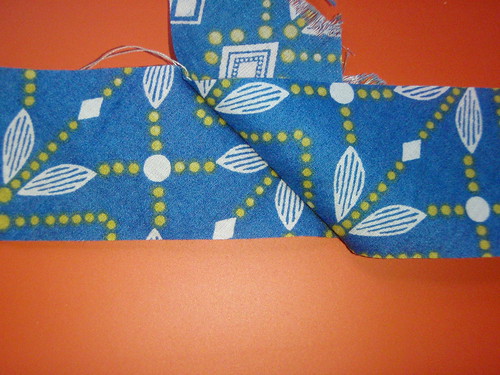
When you open it up, it will look like a continuous piece.
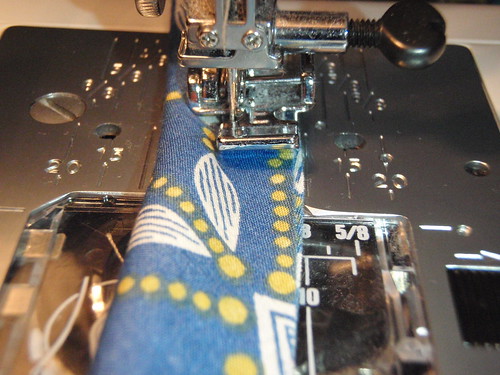
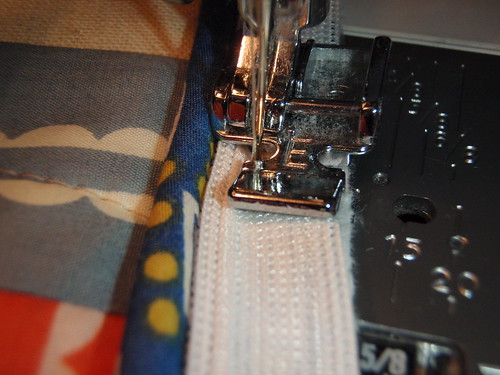
Ok, next, you want to encase the cording inside the fabric we just sewed together. I use my zipper foot for this step. I leave my needle position in the centre, and fold the cording inside the fabric so that the edges meet. Then I sew beside the cording for the entire length of the fabric.
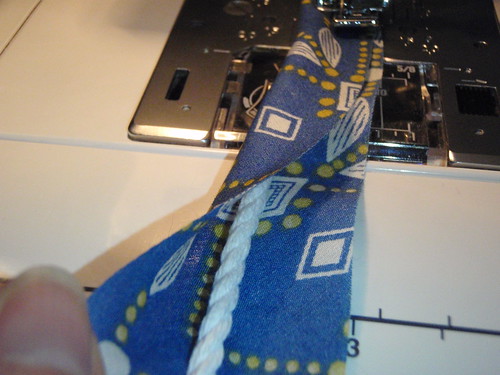
Are you still with me?? Your cording is done!
Next, we are going to sew the cording to the right side of the front of the pillow. I pin all the way around with the raw edge of the cording we just made to the raw edge of the front side of the pillow. I just curve around the corners. When you get to the end, you will cross the ends over each other.
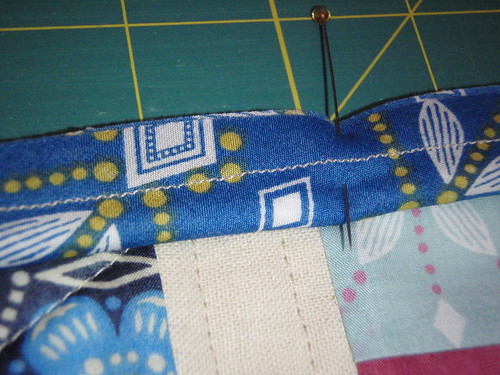
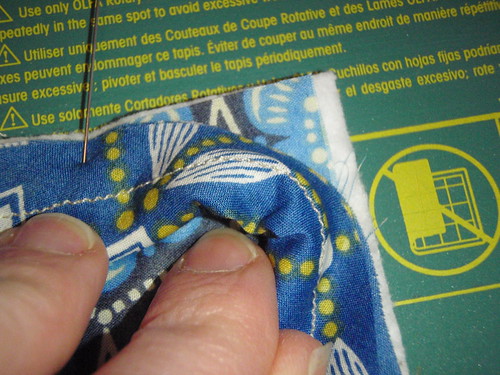
Move your needle position over to the left, so you move the needle closer to the cording, and then sew all the way around the pillow. You are going to want to try your best to sew inside the seam line you made when making the cording. That's it!!
You cross the ends over and sew over them.

Ok - now the fun part. Don't be scared. It's time to put in the zipper.
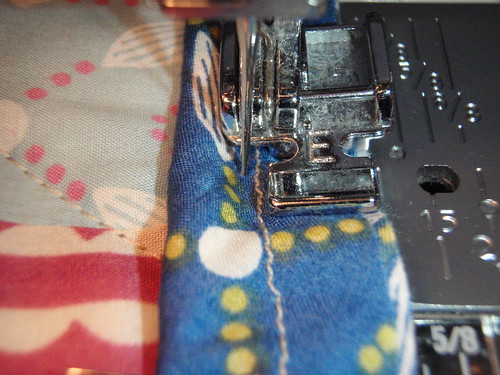
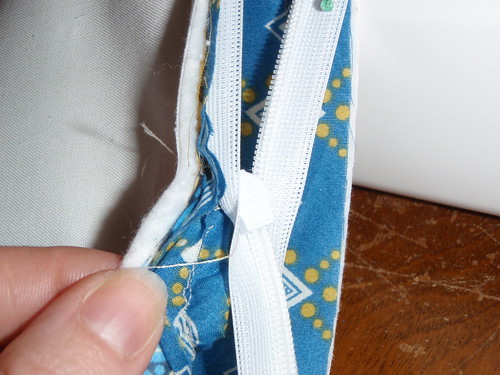
Open Zipper the full length, and iron the zipper (on the wrong side), so that the teeth lie flat.

Place the teeth as close as you can to the piping, and make sure the teeth stay flat (open). You are going to stitch in the ditch as close as possible to zipper teeth without stitching the teeth. If you hit the teeth, the zipper won't close, so this is really important.
Next, zip the zipper closed, and lay the back of the pillow, right sides together with the front. Keeping the zipper closed will help match the side edges of the pillow.
With right sides together pin zipper in place at the bottom of the pillow back matching outside edges of the pillow. You will then need to open the zipper to sew it to the back. It's really important that you can open and close the zipper, and don't get it all twisted.
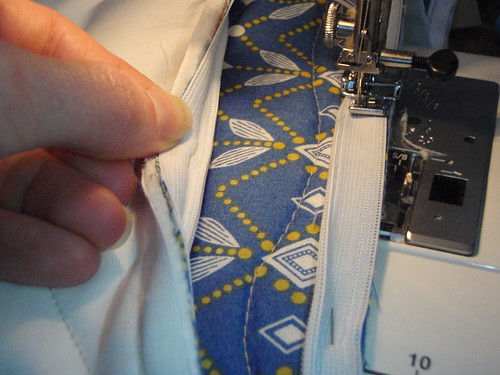
Now, keeping the teeth open, stitch in the ditch as close as possible with out catching the teeth in your stitching.
Now you are ready to close in the entire pillow. You have right sides together, and you will start sewing at one of the zipper ends. You sew over the zipper to close it in, and then sew all the way around the outside of the pillow.
I like to stitch on the side where you can see the previous cord stitching. It doesn't really matter .. but you want to sew as close to the cording without actually sewing the cording as you can. You can feel the cord, and just have the zipper foot snug into the cord.
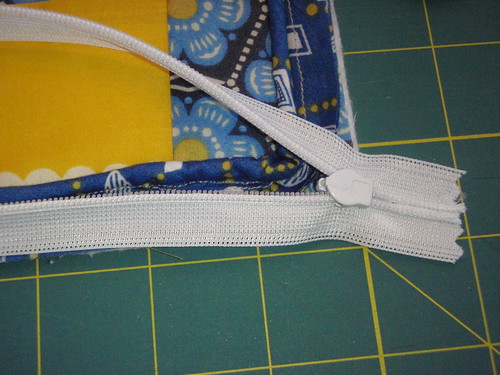
Once you go all the way around, you sew over the end of the zipper, to finish it off. Be sure to back stitch at the start and the end of these seams at the zipper point.
You will also want to make sure the zipper is open before you finish sewing all the way around, otherwise you will not be able to turn it right side out!
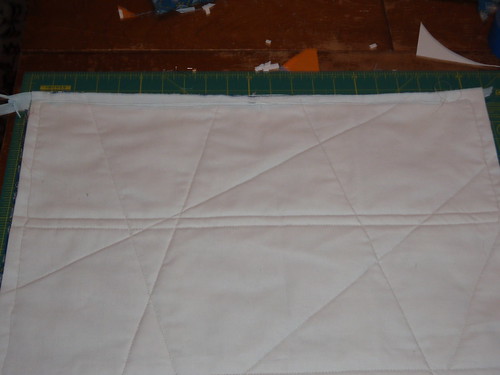
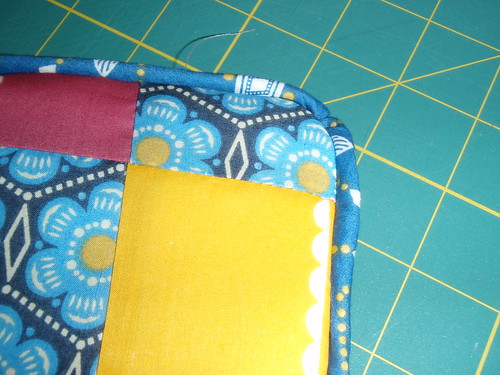
Finally, turn your pillow right side out, insert pillow fill and zip pillow! TA DA!! Done!! Your corners will look something like this ... although this isn't the best picture, since I didn't pull it out so it looked straight.
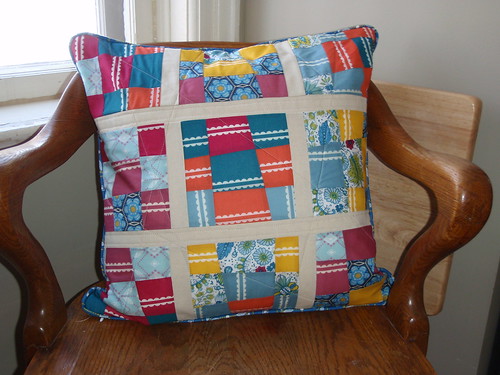
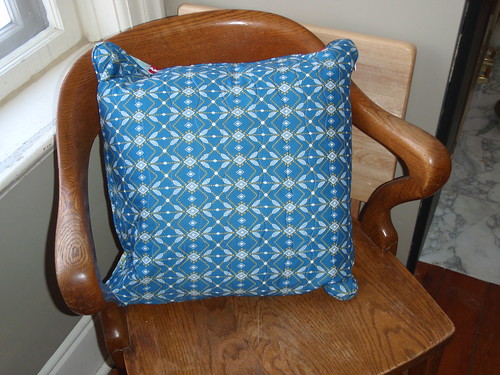
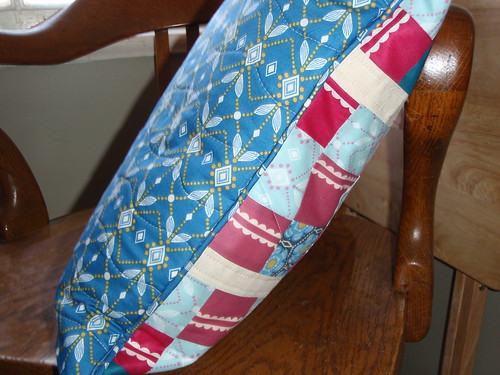
And then the finished pillow!
Does it make sense?? I know you can do it!
Yes it does make sense it's a great guide. The finished article is fantastic.
ReplyDeleteTaking the time to add this piping makes a good cushion into a great cushion and is so worth the extra effort.
Kandi x
I hate making zippers in a pillow but with this tuto I'll give it a try again!!!!!
ReplyDeleteThanks
Thank you Val, I couldn't have done it without this perfect tutorial and my pillow turned out wonderfully!
ReplyDeleteWish zippers weren't invented--but I'll try again--Thank you for good sewing lesson! Karen
ReplyDelete