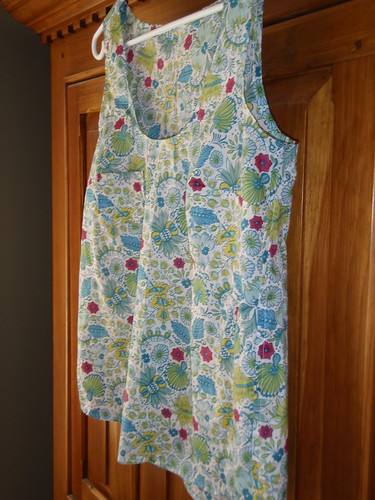
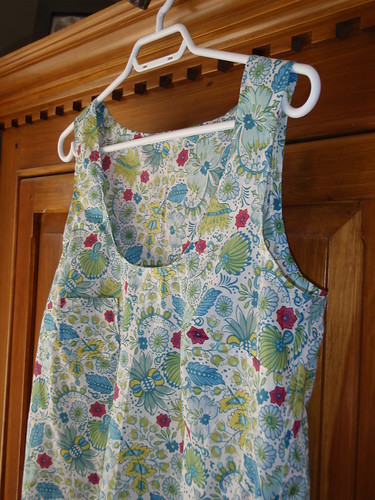
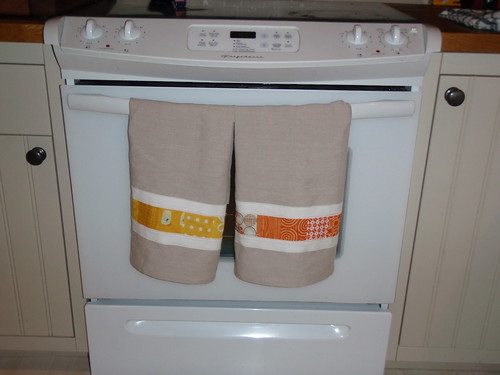
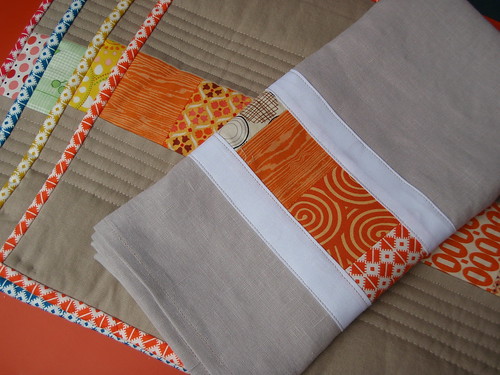
Saturday, January 21, 2012

Tova Dress

I bought a Wiksten pattern called the Tova top a while back .. and I actually made a top right away. Of course, I don't have a picture of it, but I LOVE it. I wear it ALL.THE.TIME. I decided to make the dress version.

I used a Nani Iro double gauze, and this one looks like it will be another winner!

I am not brilliant at taking my own picture, but hopefully these will give you an idea:

Tova dress

Tova dress

Tova dress

Tova dress

Hope you are having a great weekend!

Tuesday, January 10, 2012

Cross one off the Works in Progress list!!

A couple of days ago, I decided that I had too many projects on the go, and too many more that I wanted to make. I wasn't really sure how many that actually meant until I started a list. YIKES! I probably left a few off the list, but lets just say that the list is h.u.g.e.

I am proud to say to you that I have officially crossed the first thing off the list.

I'll start by telling you that I really love this store called M0851, and in particular, I really want this bag. The problem is, I can't handle the price tag ....

So, I decided I would try and make a bag that was similar. Not an exact copy of course, cause that wouldn't be very nice .. but similar. I actually even bought some leather to give it a go! This is way outside my comfort zone, but I am still think I am going to give it a try.

That being said, I wasn't really sure how to go about doing that. I started by looking at a couple of patterns that I already had, and I made a pattern, and then a sample bag. The sample bag was one of the many on that huge list, and I finished it up today!

Sample bag

Inside of sample bag

It's not perfect, and I am not sure I am ready to make the "real" one yet ... but it's at least one off my list.

Thursday, December 29, 2011

Blogger bundle anyone???

Well hello there!

Hope you all had a very Merry Christmas ... and if you don't celebrate, that you had some time off!! I am looking forward to joining you all again. It's been awhile : )

So what brought me back today you ask? Well .. I have seen a whole bunch of new "blogger bundle's" popping up all around town. I thought it may be fun to make one too! Of course, along with it goes a fun little competition! You can see the details here.

So ... here is my idea of a fun little bundle:


I had an awful lot of fun making this bundle ... and of course, I would love to have each and every one of these fabrics!

Saturday, September 10, 2011

Tiny pocket tank

I don't make tons of clothes .. but every once in a while I see something that I NEED to have.

I saw this and this. It is a Wiksten Tank top and I thought I NEED to make that!

So then, I tried to find the pattern. It isn't for sale right now. Sad! I tried to get a used copy or a tracing. No such luck. So then I started searching for other tank patterns.

Ta Da!! I found this tiny tank pattern from Grainline.

The pattern was a pdf, and was very reasonable. In a few short hours I have a new tank top!

Tiny pocket tank

Tiny pocket tank

Tiny pocket tank

Tiny pocket tank

I can't wait to wear it!

Wednesday, September 7, 2011

Paper Piecing a scrappy pinwheel

Sweet 
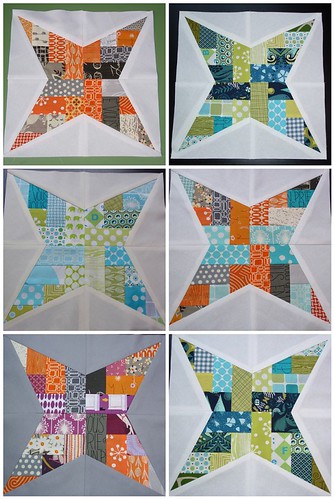
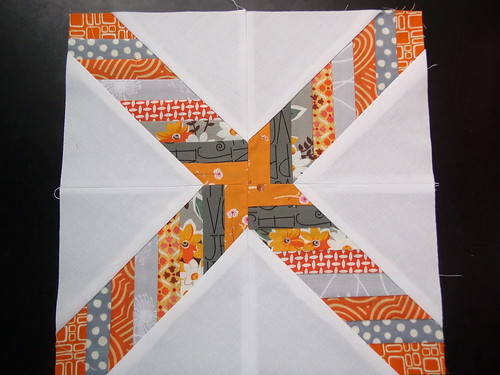
Amy was kind enough to ask for a tutorial on a block that I made. I jumped at the chance, because I am the first to google "tutorials", and if this can help someone, it would make my day. This is a block that I made for my bee members. I made them in my colours for a test block.

Alternate block for 3 x 6

So, I will preface this by saying that this pattern is not mine, nor do I claim that my method of paper piecing is the best. This is my way of doing it, so I hope you will be successful using this way.

I took tons of pictures for this post - so hopefully at the end it all makes sense. If not, just let me know, and I will try my best to help you out!

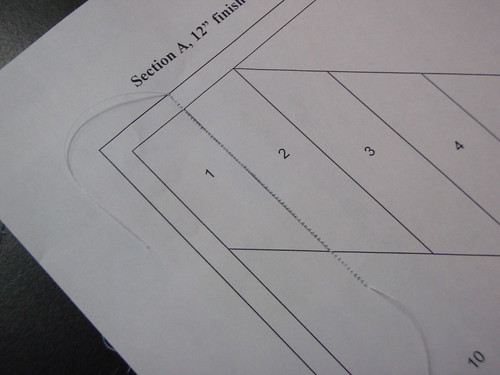
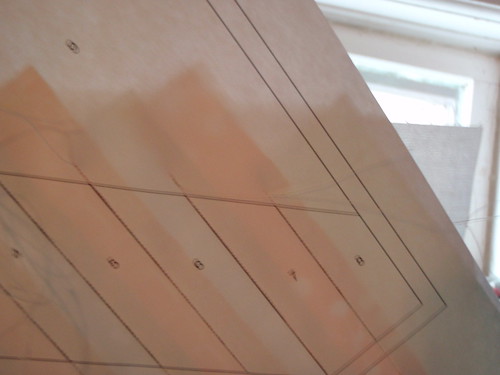
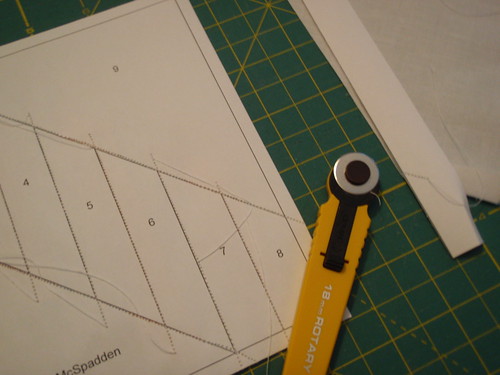
Ok - first of all, I got the pattern here. I made the 12" one. The pattern requires that you make 4 blocks, so you will need to print off 4 copies of the pattern.

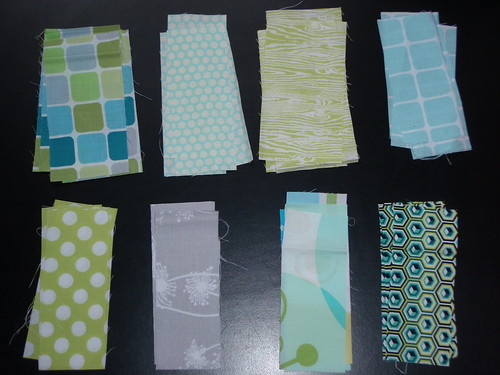
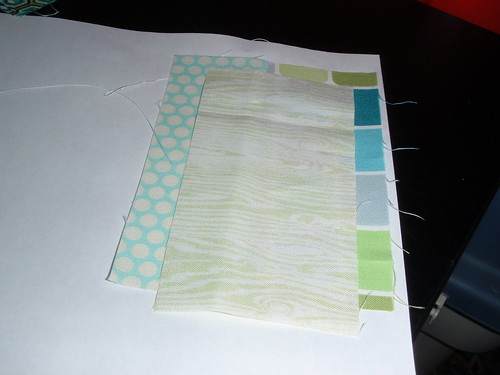
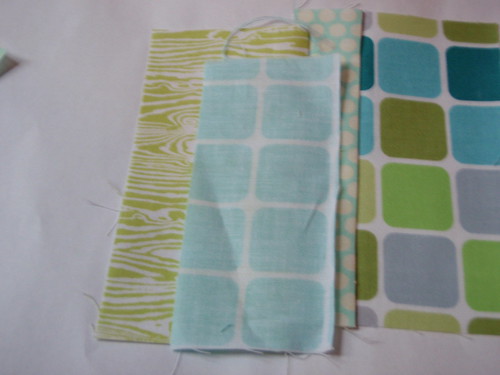
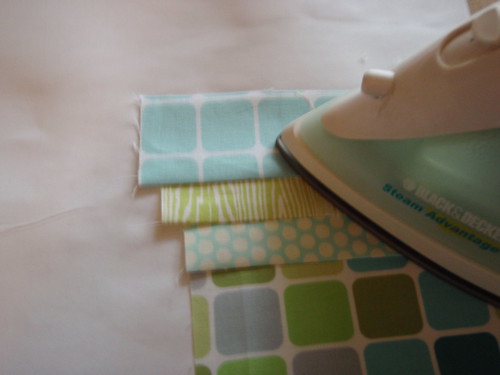
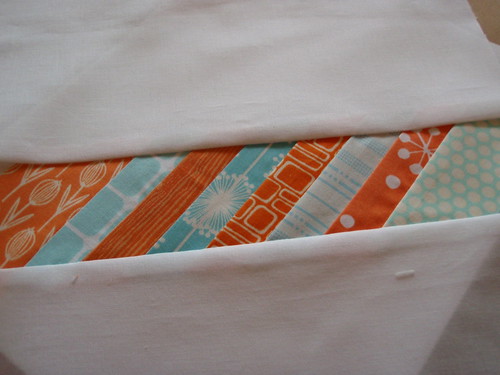
I decided to make mine with 8 fabrics, with each block the exact same. By all means you could do this block with all scraps, or any combination of fabrics that you want!

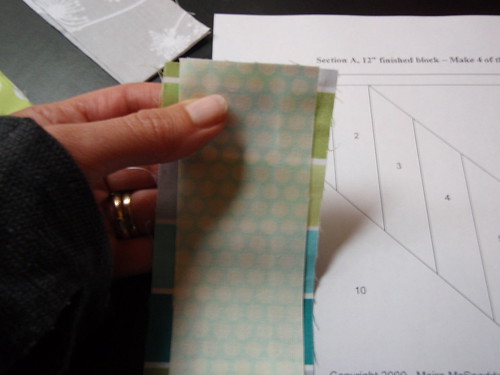
I started by cutting 3 x 5 inch pieces of the fabric that I wanted to use. 4 of each one. If you are using scraps, you just want to make sure that each piece of fabric is about this big. You need 32 pieces of fabric this size, and then will need an outside colour. I used white.

P9070564

Next, I put the fabrics into the order that I wanted them to appear in the block.

Then, I took the first two fabrics and put them right sides together.

P9070566

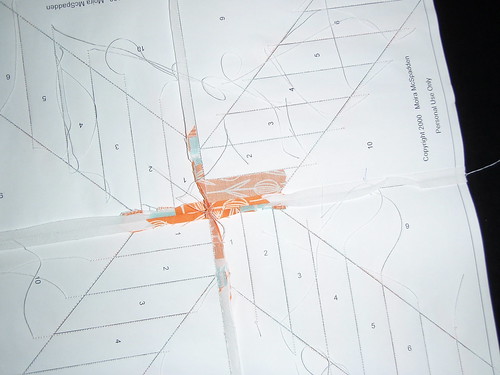
You then put these fabrics on the back side of the paper. This would be the blank side of the paper, not the one with the printed pattern on it. You will want the fabric to line up within the square that says #1.

P9070571

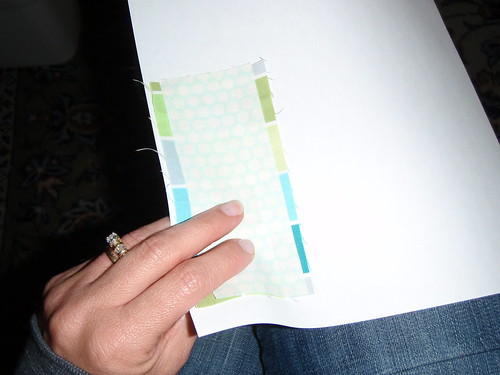
The way I check to see if it is lined up right, is to hold it up to a window (or a light if it's dark).

P9070567

Then, holding the fabric tight, and keeping it straight, flip the paper back over and head to the sewing machine. Make sure your stitch length is set to a smaller number than normal. This will make it easier to rip off the paper later. I set mine to 1.5.

You will stitch along the line between square 1 and square 2. Try to make sure that you stay on the line. You will be sewing through the paper here! It sounds a little louder than normal, but don't worry, it's all good.

P9070572

P9070573

P9070574

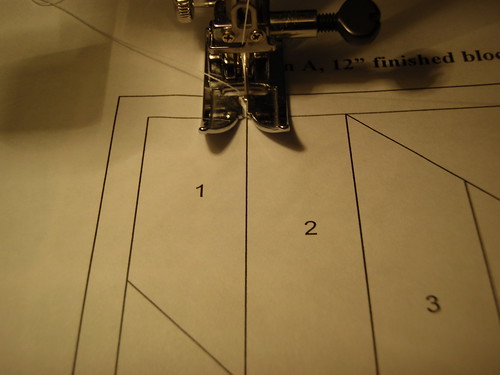
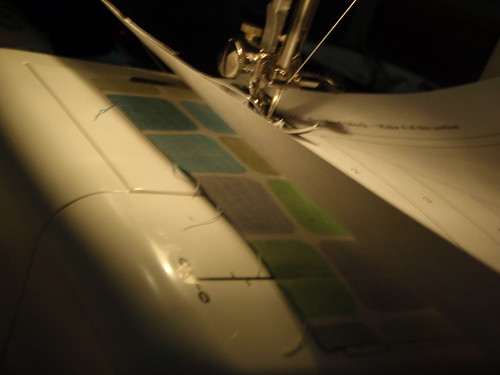
You want to make sure you sew a little bit on each side of the line for the seam allowance. We don't want any holes!!

P9070574

Next you iron the fabrics nice and flat.

P9070580

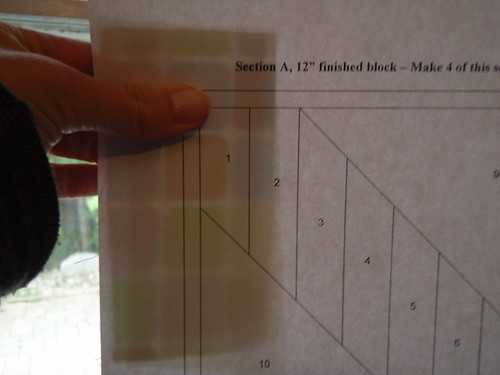
Now, choose your next fabric, and then place this fabric right side down. I usually guess where I think it will work, and then double check by holding it up to the window.

P9070581

P9070584

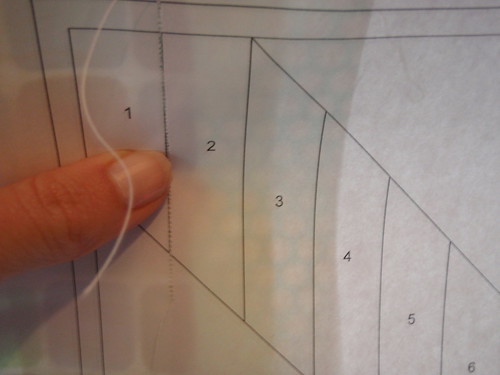
It was kind of hard to capture in the picture, but you want the fabric to be over the line between square 2 and 3 by about 1/4 inch.

Once you have it all lined up, go ahead and hold the fabric tight, and flip it over so you can sew along the line between square 2 and 3.

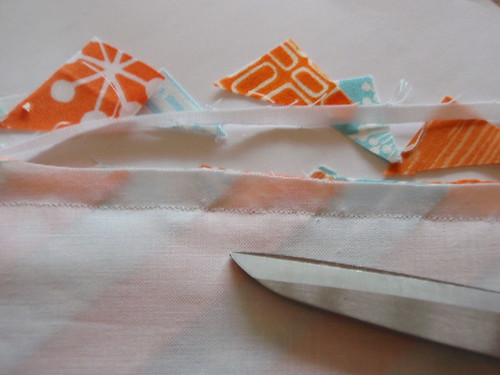
Then, we are going to need to do a little trimming. I try and make about a 1/4 inch seam, but it doesn't need to be accurate!

P9070587

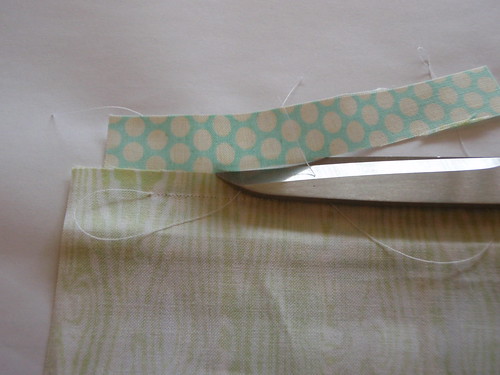
Next, you are going to iron it nice and flat!

P9070588

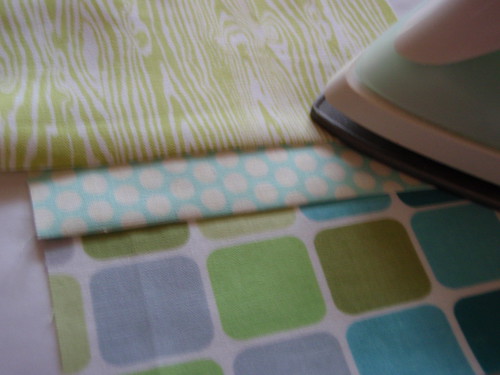
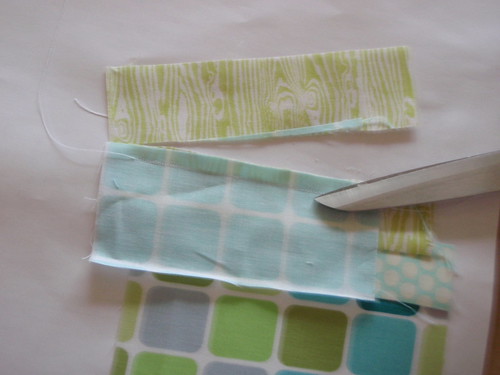
Ok, again, choose your next fabric, and lay it right side down guessing where it would overlap the line between 3 and 4 by about 1/4 inch.

P9070589

Sew on the line between 3 and 4, and then flip and trim and iron again.

P9070592

P9070595

P9070597

You are going to keep going with this process until all 8 squares are done.

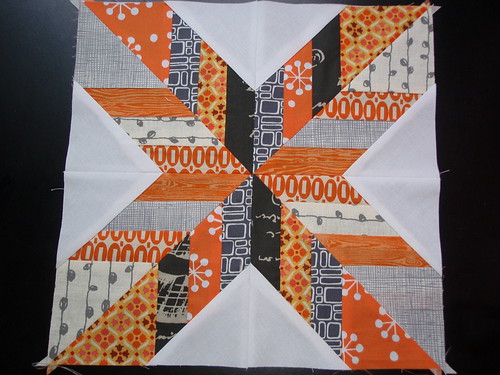
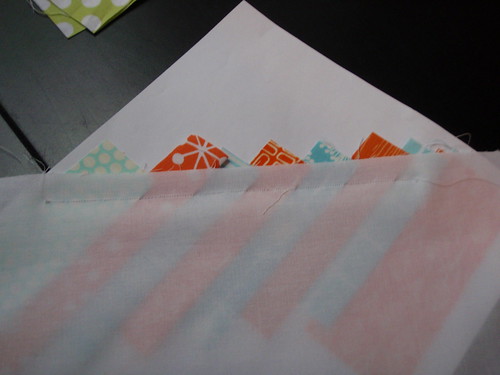
You will notice the fabric changes here ... I am making bee blocks, so I went ahead and used a different group here.

Now we are going to do the boarder fabric. I choose white, and I cut the fabric about 5 inches by 10 inches. If you do this, there will be a lot of waste. I just don't like unpicking seams because there isn't enough coverage.

So, start by laying the white fabric over the exisiting fabric, trying to get it to be at least 1/4 over the sewing line between the numbers 1-8 and 9.

P9070609

Check to make sure it's good!

P9070610

Sew, trim and iron. Then, repeat for the other side.

P9070611

P9070613

Here is picture after both sides are done.

P9070616

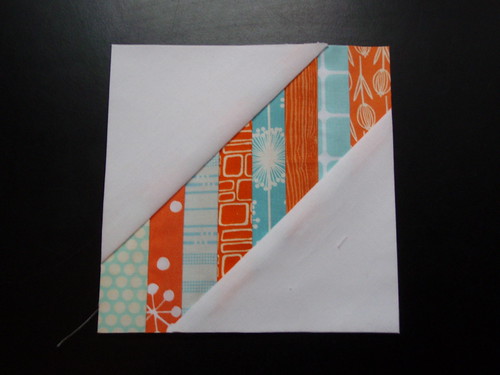
Then, go ahead and trim up your block. You will want to make sure you are cutting leaving the seam allowance.

P9070617

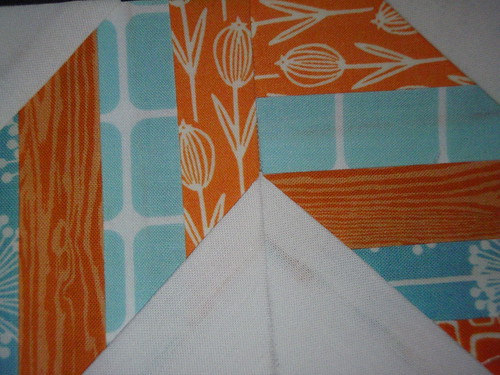
Your square will look like this now:

P9070618

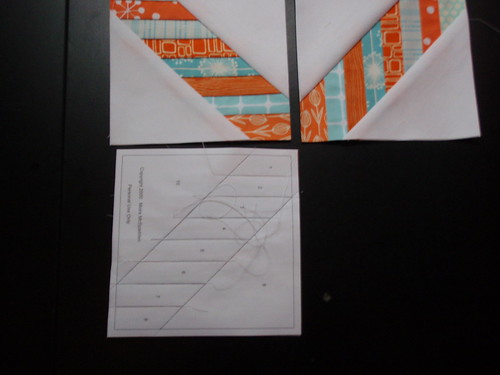
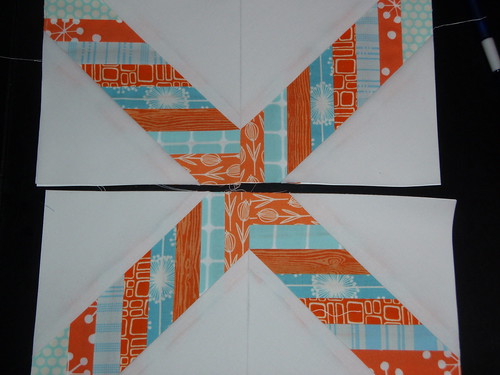
You need to make 4. Again, I made all mine the same. Then, lay them out in the design that suits you.

P9070619

Don't take off the paper yet!!

You need to sew the 4 together into your block!!

P9070620

If you like, you can take off the paper outside the seam allowance to lessen the bulk before you sew the two sides together. I like to do this, and then press my seams open. It's up to you, but I love looking at the fun points!


P9070626

Ok .. almost done!!

P9070633

After sewing all four of the blocks together - take off all the paper. I love this part, but you want to be careful not to pull the seams. So long as you shortened your stitch at the beginning it should be just fine.

P9070635

After the paper is off, press it again, and ta da!! You are done!


P9070634

I hope you don't have any trouble with anything here - but if you do (or if you find any mistakes!!), please let me know!

Sunday, August 7, 2011

hmmm ... something happened to July!

Hi Everyone!! I totally disappeared for an entire month. Sorry about that. I can't say I have any particular reason. I have just been busy enjoying the weather and some downtime.

I have joined a couple of bee's, and have been making a few blocks. Here are my completed blocks for the 4 x 5 bee:

4x5 bee blocks - All 6 together!

I am just about to start making some for the 3 x 6 bee. I started with a trial block in my colours:

trial block - 3 x 6

I think I will try one more trial before I make a final decision.

Other than that - I have just done odds and ends. Like these hair ties I made with my daughter last week:

Button hair ties

flip flop hair ties

I can't say I will be around much in August either, since we have two weeks planned up at the cottage, but I will be back!

Thursday, June 30, 2011

The mail is running again ...

The mail man (woman too) are finally back to work, and just in time! They must have known I had three swap deadlines this week! I got them all out in the mail, and hopefully they won't take too long to get to their new respective owners. I hear there is a bit of a backlog since Canada Post has been off for a bit.

Anyway, here is the first of the items. It's a bag made from a Keyka lou pattern. My partner said she liked Anna Maria Horner, so Anna Maria Horner it is!

keyka lou easy reusable grocery bag

The second one was a little more last minute than I would have liked. I had ordered some pre-made linen tea towels from Stefanie, but unfortunately, they haven't arrived yet because of the strike (boo). So, I washed some linen, and made my own tea towels. They are a little wonky, but hopefully close enough. Pure linen is tricky!
I used a candy bar of Bliss, and made some dresdens for the front. I had never done these before, and I am pretty pleased with the result.

Tea towels

And lastly, was the Spicing up the Kitchen swap. I showed you a little peek of the placemats a while ago, but I also made some tea towels.

P6250337

P6250335

Spicing up the kitchen!!

So now all my current swaps are done. I will be waiting patiently for my items to come in the mail, and I may or may not be stalking the postman a little : ) I am sure I will be signing up for something new soon enough.